Good Morning fellow crafty people, today this post is for you!
So this is my second year at making what I like to call my Mabon Tree. It's really an activity tree as it could be used for any holiday or any occasion. A friend of mine thought this would be a good idea for a chore tree for children or for teenagers to earn money for things they want (her kid is earning money towards a guitar he wants). A teacher could put extra credit assignments, reading assignments, book reports, research topics, ect on there too. Like I've said, its a great craft to make and it doesn't have to be religious in any way unless you want it to be. I *think* it could work for any religion. I'm not sure how you'd do it for some of them but then that would be up to you to figure out. Anyways I'm going to show you how I make this activity tree. Are you ready? Let's go!
 |
| Pot that I used & re-painted |
Step 1: Collect materials.
You're going to need a few supples:
- Small Vase or Pot
- Clay or Floral Styrofoam
- I would recommend using gloves & an apron if you use clay. You'll
also need some water to smooth the clay out. If you go with Styrofoam
you'll need heavy rocks or those glass jewels to weigh down the
styrofoam so it doesn't come out of the pot. You could also hot glue it
to the pot, which you'd obviously need to add hot glue and a hot glue
gun to your list if you don't already have those on hand (also found in
the floral section usually but could be in the "glue" area depending on
the store).
- Paper clips, ribbon, twine, thread, yarn, ect or ornament hanger
- Index Cards
- Any type of paper would work really, index cards are just quick
and easy because they are blank on one side and lined on the other.
Cardstock, colored paper, scrapbook paper (if it's white on the back),
ect will work just fine too.
- Scissors
- Adhesives like Glue and/or Tape (I used some Washi-Tape)
- Hole Punch
- Writing utensil
- Fallen Tree Branch
- The "Fallen" part is the most important part. You SHOULD NOT break the branch off of a tree that is still growing, alive, ect. This should be something that the tree has already shed. The whole point of this exercise and the religious context as far as us Witchy's are concerned is that nature has given up this portion of the tree. Also, remember to give is better than to receive, make sure you leave something behind in thanks.
Optional Materials:
- Ink & Stamps
- Markers, Crayons, Colored Pencils, Paint
- Glitter
- Sealant (if you use paint and glitter)
- Paint Brush
 |
| Painted the pot white to cover up the artwork - Sorry! |
Step 2: Prep Your Container
I got this small terra cotta pot at The Salvation Army recently. You can see that and more in my
Thrift Store Haul video via youtube if you're interested to see what I got for $6.65 total. That's witchy-crafty on a budget! ;) Anyways, I loved the design but not for Mabon, more for Ostara. Regardless, I painted over that beautiful artwork. Made it a little more Mabon-color-friendly.
 |
| Color Mixin' |
I painted it all a white base, then mixed red acrylic, which was really runny, with some modeling paste to thicken it up and then some Martha Stewart Glitter paint, which was also runny. Not a good combo. Took me three coats to get it this color and because I'm impatient I used my heat embossing gun to dry the coats.
BEWARE THE BUBBLES! Keep it moving, high above, don't concentrate on any spot for too long or you'll get these icky bubbles that you have to squish down with your fingers to smooth out and then paint over. Get under the rim, paint the top rim and when that's all finished and dry, get the bottom too.
 |
| One coat isn't enough for this mixture. |
 |
| Paint everything, including the under rim and the top rim - even the inside a fair ways down. |
 |
| See the bubbles? UGH!. Three coats and she was as red as she was going to get. *sigh* |
Step 3: Prep Your Branch
I decided to paint mine and then for some Earthly reason add glitter?
I HATE GLITTER. I put down newspaper and a drop cloth for my desk/crafty area and seriously took my clothes off in the bathroom shower and it
STILL got all over my bathroom floor, all over me even though I was careful to remove my shirt away from my face, my desk, ect. It's just awful. I'm going to be insensitive here but it really is "the herpes of the craft world" because it never goes away. Never! So beware the glitter! If you like it well then that's your thing. My mom started out doing her branch plain Jane and then saw mine and was like "give me your glitter, I want to do it" and my immediate reaction was "
DO IT OUTSIDE!" Especially because once you put glitter on it, in order to keep it from going
EVERYWHERE you need to seal it on there. So this step has about 3 parts to it if you go this route:
Paint, Glitter, Seal!
 |
| Ew, glitter... what was I thinking? |
 |
| "Sealer" with a gloss finish stage right (your left). |
That's it. Use the sealant outside - it's like spray paint and needs proper ventilation to prevent the intake of the fumes. No huffing kids, do this with a mask on and an open window if you have to do it inside. Maybe under the oven fan? Also, use newspaper to try and contain glitter and paint exposure to a minimum.
If you don't want to paint your branch, you want to leave it natural - you were smart - and you're done with this step. ;)
(
Side Note: It's the next morning and I just picked Glitter off my my caps lock button. My laptop was stowed away under my bed in a case - that's how much I hate glitter - and it
STILL managed to be on my hands or something after a through shower, hand washing and desk sweeping/cleaning and contaminate my laptop.
UGH!)
Step 4: Add Your Branch Anchor To Your Pot
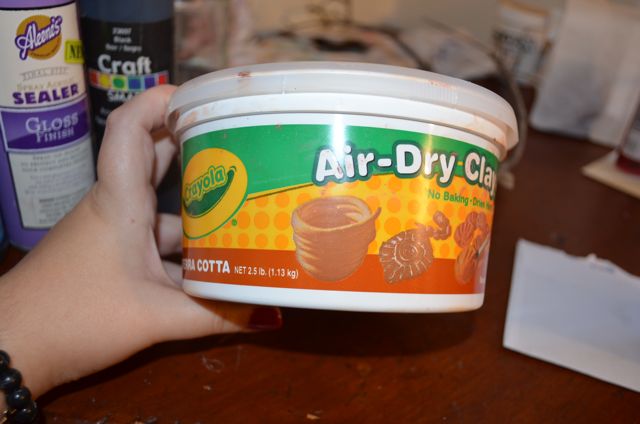
You can't just stick a branch in an empty pot the same way you can't add a plant without dirt to a pot. You need some fake dirt. You can't use real dirt because in the end, your branch will fall over. This is my second year doing this and let me tell you I made that mistake during last year's attempt and I know better. So I started out wanting to use Floral Styrofoam and then changed my mind and thought Clay would be better because I could paint it to look like dirt (it came in terra cotta color so I didn't need to do that) and wouldn't need fake moss or grass to cover the Styrofoam. If you're a big Floral arranging person and you like that stuff go for it but you'll still need to anchor the Styrofoam by using rocks or hot-gluing it to the pot.
 |
| We still have some left over after doing mine and my mom's pots. Hers was a bit bigger than mine too. |
My mom and I got this big thing of Crayola Clay for like $9 at Micheal's but they were having a sale anyways that you BOGO 50% off so if you REALLY do a lot with clay (which I do) then it's a god send. Otherwise wait for a 50% off coupon and use it on your clay.
 |
| Scalpel please! |
I recommend gloves, newspaper and an apron if you go this route. The clay will stain you, your clothes, whatever it touches and get under your nails, and into cracks and crevices so be mindful when working with the kiddies. You'll also need some water and possibly molding tools but that part is up to you. I used a molding tool to get the clay out (using hands turned out to be easier in the long run) and then smooshed it down into the pot with my hands. Then I made the middle a little thicker by taking a clump and smoothing it into the top-center of the pot because I knew I was going to stick the branch there and need to smooth some clay around the branch to fully anchor it in. My branch had a little nub at the bottom so I made sure that was submerged and smoothed the clay with water and my gloveless-finger so that when it dried out and hardened I'd be good to go.
 |
You can see the mound I made to stick the branch in.
I also didn't apply paint or glitter all the way to the bottom of the branch.
I stopped with the glitter and made a sort of "handle" with the black paint.
The very tip of the branch I knew would be hidden so I didn't bother painting it.
Keep your paint out because the clay will get all over the branch and stain it.
You'll need to touch up your paint but only if you painted it. |
Step 5: Wait For It All To Dry & Prep Your Cards
This is the most tedious but creative part of the whole experience - making the little tags that hang from the tree while you wait for your clay to harden and your branch to dry. My mom & I put ours outside to dry overnight. You'll want the cards prepped if you plan to meditate on things you need to accomplish in the coming months during your ritual. That's what you put on the cards - things you want to accomplish. You pull one off and you have to do whatever is on the tag and you do this whenever you have free time.
 |
Supplies I used (and some I didn't) for my "tags."
Don't use those real tags or you/ your kids / students, ect will cheat and look.
NO PEEKING! |
This was another rookie mistake I made last year. My whole ritual took me 5 hours because I made the whole tree in my circle and I had to keep getting things - I was just woefully unprepared for the process. This year I'm going in fully-prepped so all I have to do is take my pre-decorated tags in with me, think about what I want to accomplish, write them down, seal them and hang them. Presto-change-o I'm done in about an hour, two max.
 |
Making the "tags" for my tree. I do not recommend using traditional tags.
It's so you can peek & cheat! |
I have a method for my madness I assure you. I picked up this set of 12 ink pads for $4.99 (50% off because they weren't on-sale and I used my coupon). I took 4 fall colors and limited myself to 20 things to accomplish (well, 21 but you'll find out why in a minute). You want to be careful the number of cards you make. You don't want to make too many and never accomplish all your tasks (you have until Ostara to do these BTW) but you don't want to accomplish them all by December because what are you going to do until Ostara? You could make more but that's not the point. I have a friend who thought of the idea when I was sharing this with her that you count the number of weeks between Mabon and Ostara and do one tag a week (it would be about 28-29 tags depending). That would fit perfectly with me because I give myself deadlines to accomplish the tasks I pull. You are the only one who knows your schedule. Don't give yourself more than you can handle but don't sell yourself short either.
 |
| Two tags made, only 19 more to go and those must be done during ritual! |
Anyways, I took an acorn stamp and stamped five cards with the four colors, plus I decided to do one extra one that I will purposefully set apart from the others and you can see why - I want the last tag I pull to be prepping these for next year! You can use your own special ink, a pen of a certain color (I liked my orange sharpie pen because it reminded me of fall) or whatever is laying around. Write in crayon if you'd like.
 |
| Bottom Right - I made only one stand out from the others. 3 Pieces of tape, gold ink & stamped on both sides so I pick that task last - it's just making these again for next year. No big deal! |
So make and decorate your tags any way you'd like. I fold over index cards that I hole-punch and thread ribbon through, then tape the card shut with my task inside and hang it on the tree. You don't have to use stamps and ink either. You could draw, print out images, leave them blank (how boring but to each their own), use colored paper, ect. You don't even have to use decorative tape or tape at all. You could use glue dots, regular glue, seal it with wax from your ritual candles, whatever you'd like. The whole experience is what you like and your tastes. You're the one who has to look at it for the next 7 months or so.
 |
| This is what the "final" tag says - I'm so sassy even to myself. |
Step 6: Think, Write, Seal, Hang (During Mabon Ritual for us Witchy's)
Basically what the step title says... Fairly simple process but it could get as complex as you'd like it to
be. I know this seems like so much but really it isn't a lot if you do
it in stages. This is why I am telling you how to set everything up NOW
so this weekend when Mabon hits and you're thinking of things to put on
your tags you don't have to do anything but think, write, seal, hang!
 |
This is how the tags will look when you hang them from the branch.
Notice the branch isn't painted? I did it last so I could work with the branch easier for this picture.
Unfortunately I can't show you the final product w/all the tags until after Saturday. |
You can use pretty much any material to hang these. A paper clip can be unfolded and turned into an ornament hanger, or if you have some of those lying around from Christmas use those. You could use yarn, ribbon, twine, thread, ect. You could even just use the hole you punched and use that to put it onto the branch!
That's it. This is a great idea for parents to do an activity with their kids (I'm thinking chores Mom & Dad!), teachers, ect. I actually had a teacher do something similar to this but with our names in 1st grade. We put our names in a bucket at the beginning of the year and each week she'd draw out a name. The next week we'd have to bring in a book to read with our parents. We'd read a book, then our parent(s) would. The class would make an anagram of our name, that would go on a heart that was either white, pink or red and she hung it on a tree just like this. See? These trees are for everyone! So go out there and make one yourself - I'd love to see pictures.


Comments